
Please be aware that you will require the back end setting 'Use Factory Location Operating Hours or Shifts to determine Working Hours' set to 'Shifts' to be able to access the below settings within 'Admin', 'Configure Factory'. Please contact Desk Support to get this setting changed.
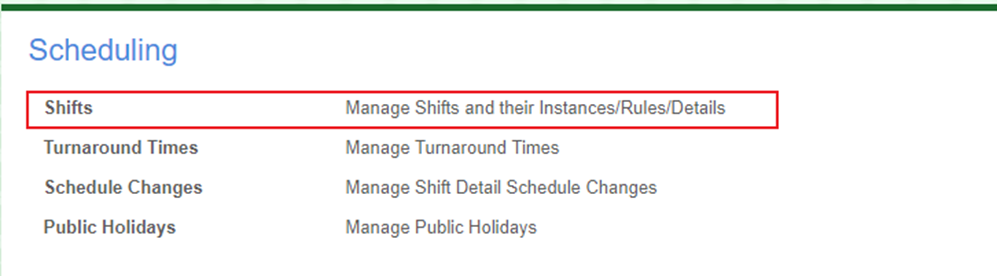
As part of the Schedule setup, every ‘shift’ (stock line) must be entered. You also setup the ‘turnaround’ time on the shift. This is how many days the stock takes to produce for ‘cut and pack’ jobs only. Any additional finishing is handled under ‘Turnaround Times’. From the ‘Admin’, ‘Configure Factory’ screen, go down to ‘Scheduling’ and select ‘Shifts’.
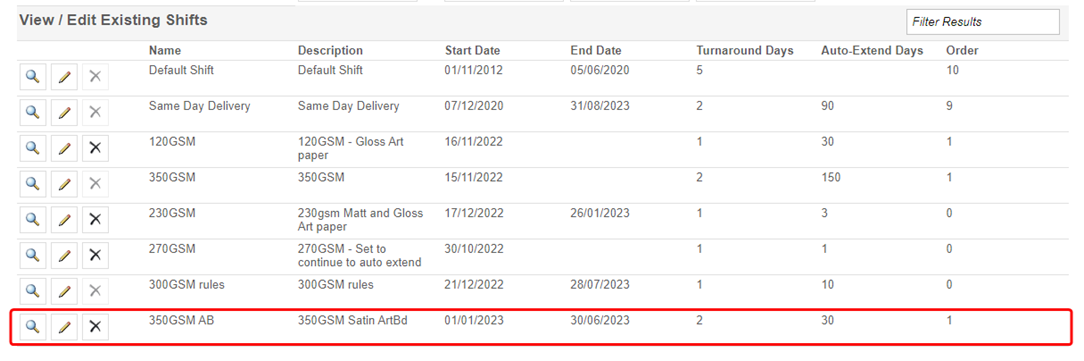
The below screen will appear. Here you can create new shifts or edit existing ones. To create a new shift, enter the details in the blank fields under ‘Create New Shift’.
In this example, we are using 350gsm Artboard with no laminate.
Enter the following details:
Name: Give the shift a name that easily relates to the product.
Description: A more detailed description of the product can be entered here.
Start Date and End Date: A Start Date must be entered. End date is optional.
Turnaround Days: This is where you enter the standard turnaround time for the product without any additional finishing. In this example, 350gsm Artboard with no laminate will run 5 days a week and dispatch next day. The turnaround will be ‘2’ so if it imposes on a Monday, it will dispatch on a Wednesday. If it had a ‘3’ day turnaround and imposed on a Monday, it would then dispatch on a Thursday.
* Please Note: on a 5 day a week turnaround, Saturday and Sunday is not included.
If you change a ‘Thursday’ shift with a ‘1-day turnaround’ to a ‘2-day turnaround, the system will change the dispatch day from FRIDAY to MONDAY.
Auto-Extend Days: This shift is set to auto-extend by 30 days. This means that before the final shift date is reached (configured under recurring shifts), the shift will automatically be extended.
The system will always keep shifts for up to 30 days into the future.
Shifts will continue to be automatically generated until the End Date has been reached.
Order: Here you can enter an ‘order’ in which the shift will be produced. Example if you had 350gsm with ‘No Laminate’, ‘Gloss Laminate x2’ and ‘Matt Laminate x2’ we could number the products from 1 to 3 depending on the priority order. If this is not a major concern, you can just leave it at ‘1’ in most cases.
Once all details have been entered, click the ‘green tick’ to activate the shift’. It will now appear in the list of shifts as shown below:
Now the shift is showing in the list, the next process is to add shift production details. To do this, click the ‘eyeglass’ icon next to the shift:
This will bring up the ‘Manage Shifts’ screen which is divided into 3 sections:
Shift Templates
Shift Rules
Shift Details
Shift Templates
You need to create the ‘Shift Templates’ for when the stock will run.
As the 350gsm AB with no laminate will run Monday to Friday, we need to create all these shifts starting with Monday.
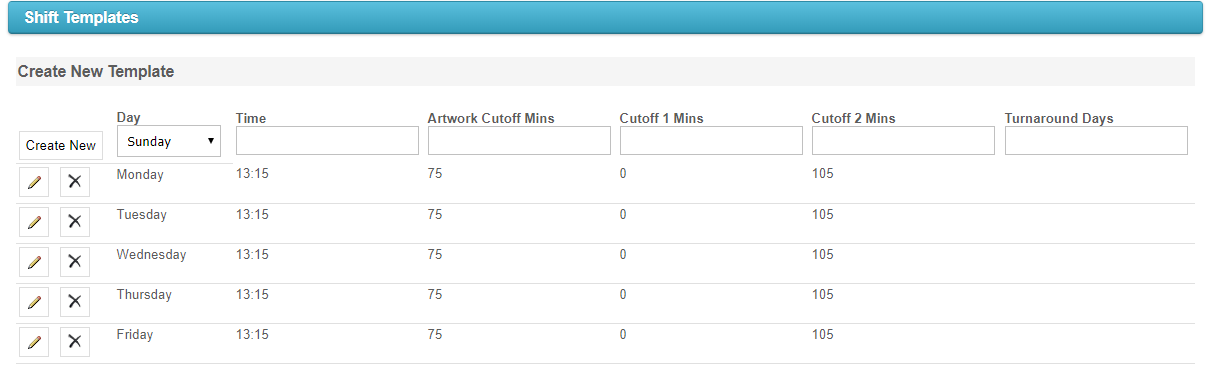
Day: Enter the day
Time: This is the time of the day that the stock can be imposed by Pre‐Press (24 hour clock).
Artwork Cutoff Mins: This is entered as a total minutes ‘before’ the imposition ‘Time’ that the artwork must be approved. For this example, it is 75 mins before the imposition cut‐off making the Artwork cutoff at 12:00.
Cutoff 1 Mins and Cutoff 2 Mins: These are two additional fields where you can add other cutoff times. This represents the cut‐off Pre‐Press need to have the stocks imposed and ready for the press. This stock must be at the press by 3pm so the cut‐off is set at 105 mins. For ‘Cutoff Mins 1’ just put in ‘0’. This will make the first cut‐off 13:15 to match the ‘Time’ field.
Turnaround Days: Any days you enter in here will apply to that day only rather the overall Turnaround days you set earlier.
Enter this for all the days during the week the stock will run.
Shift Rules
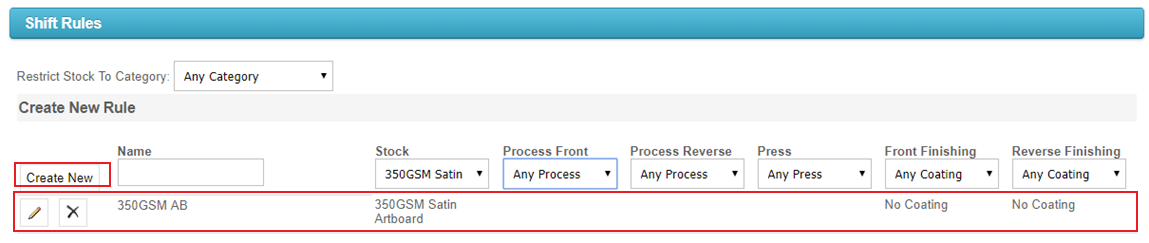
Under ‘Shift Rules’, create the stock details by specifying what is included in the ‘standard’ finishing for the item. As this is just ‘350gsm AB’ with No Laminate, it is straight forward. Just enter a name and stock. If it was a laminated stock or had spot colours, this information can be entered here under the ‘Process Front and Back’ and ‘Finishing Front and Back’ headings. Just enter the required details and click ‘Create New’. The rule will now appear underneath:
Shift Details
Next area is the ‘Shift Details, which controls ‘recurring’ or ‘One‐off’ shifts. As most factories work to a schedule; ‘recurring’ shifts will be used most of the time. Just enter a ‘Start and End’ date and click ‘Create Recurring Shift’.
Note: An end date must be entered to create recurring shifts

A list of shifts for the specified date range will appear at the bottom of the screen. If a ‘one‐off’ shift was created rather than a recurring one, only one shift would show at the bottom. The shift has now been created. The cut‐off times are now converted from ‘minutes’ into actual times:
How to edit or remove a shift (stock line)
As part of the schedule, from time to time, adjustments to turnaround times on individual stocks and/or dates to match any revised temporary schedule at times like Christmas or Easter may need to be made.
From the ‘Admin’, ‘Configure Factory’ screen, go down to ‘Scheduling’ and select ‘Shifts’.
The shifts screen will appear. Here new shifts are created and the editing of existing ones. To create a new shift, enter the details in the blank fields under ‘Create New Shift’:
Locate the shift which needs amending and open it up. To do this click the ‘eyeglass’ icon next to the shift:
There will be a list of all the ‘shifts’ that the stock will run at the bottom of the screen. From here you can alter the cut‐off or turnaround time on the stock or delete the instance altogether.
Click the ‘Pencil’ icon next to the instance if you need to edit, or the ‘x’ to delete the instance e.g. to edit or remove the Christmas shift turn-around times look for the Christmas dates in the list. Inside the Shift Details, the 'Turnaround Days' and 'Cut-Off' times can be adjusted.
*Please Note: works on a 5 day a week turnaround. Saturday and Sunday are not included.
If you change a ‘Thursday’ shift with a ‘1-day turnaround’ to a ‘2-day turnaround, the system will change the dispatch day from FRIDAY to MONDAY.
How to create/edit turnaround times
Please be aware that you will require the back end setting 'Show Advanced Turnaround Time Admin Screen' set to 'Yes' to be able to access the below settings within 'Admin', 'Configure Factory'. Please contact Desk Support to get this setting changed.
Companies offer many additional finishing options on their products. Each option and quantity break have different additional days attached to them. To set and /or alter these additional days you need to go into the ‘Turnaround Times’ section of IQ.
From the ‘Admin’, ‘Configure Factory’ screen, go down to ‘Scheduling’ and select ‘Turnaround Times’:
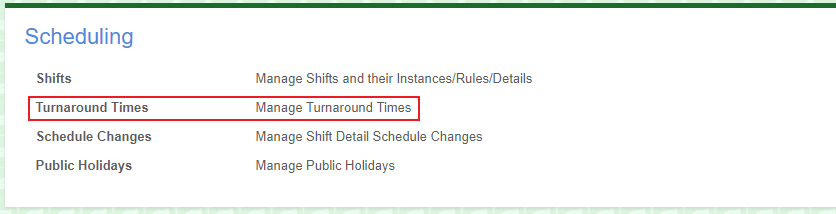
The Turnaround Time Rules screen will appear. From here, the turnarounds for various finishing like ‘Shifts’, ‘Job’, ‘Section, and other finishing can be selected.
For the first example let's look at ‘Shift’ sheet qty turnarounds.
This is where a certain quantity break for a standard turnaround can be selected or mark the job if it has a NAT/VIC delivery schedule (this is where it dispatched at 5pm for National but the Vic deliveries do not get sent until the next morning).
You can see in the example below that we have two entries for 100gsm Laserbond stock:
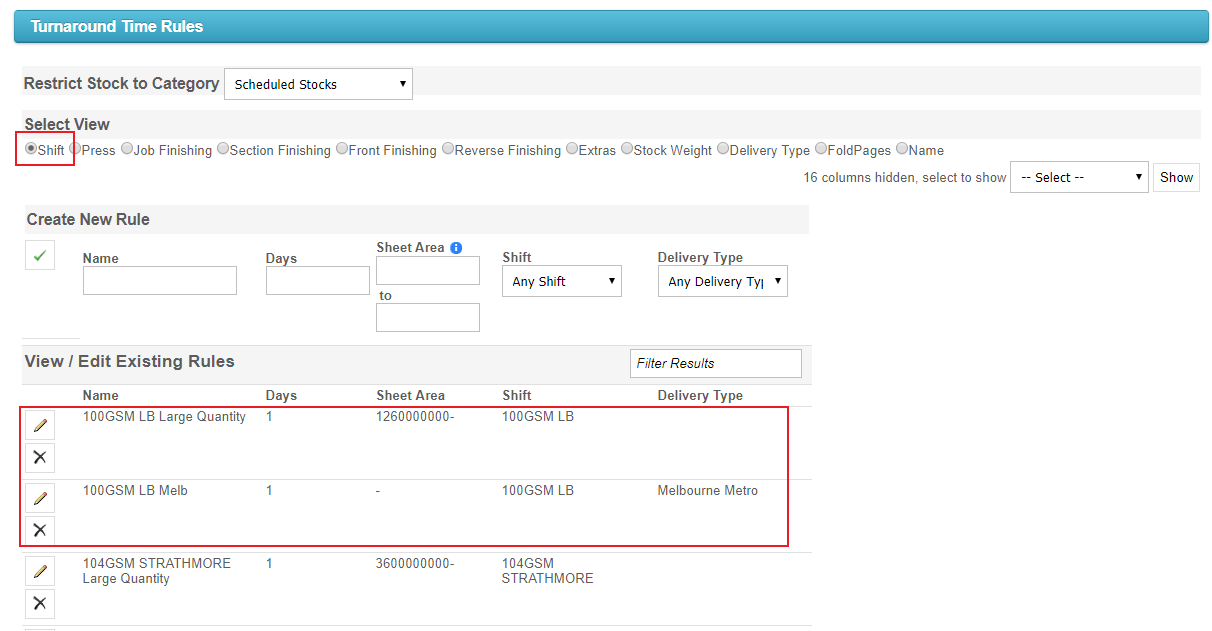
100GSM LB LARGE QTY:
Here the ‘Days’ are set at ‘1’. This means that this item will have an additional 1 day added to the standard delivery.
We also have ‘Sheet Area’ set at 1260,000,000. This means if the total sheet area of the ordered product adds up to exceed this quantity, it will have this additional 1 day added to the turnaround.
100GSM LB Melb:
Here the ‘Days’ are set at ‘1’. This means that this item will have an additional 1 day added to the standard delivery.
We also have ‘Delivery Type’ set at ‘Melbourne Metro’. This flags the stock as a NAT/VIC delivery schedule (this is where it dispatched at 5pm for National but the Vic deliveries do not get sent until the next morning).
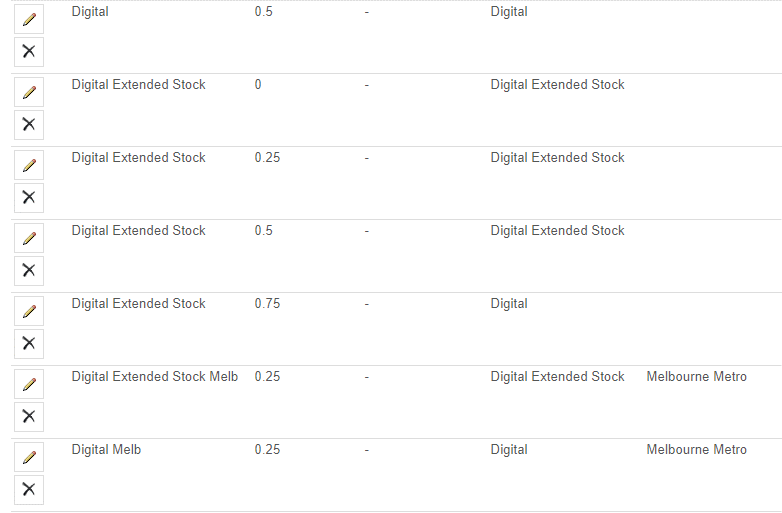
Below is a list of Shift Sheet Rules added for Digital
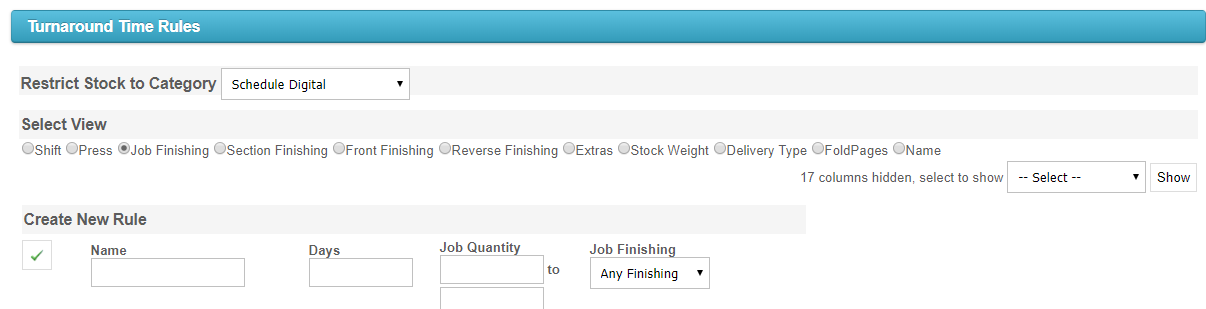
Next, let's look at setting the turnaround days for finishing components.
The below example shows the additional turnaround days added to ‘Presentation Folder 01’ and a ‘4pp Score and Hand Fold’ based on their ordered quantities.
These are set under ‘Job Finishing’.
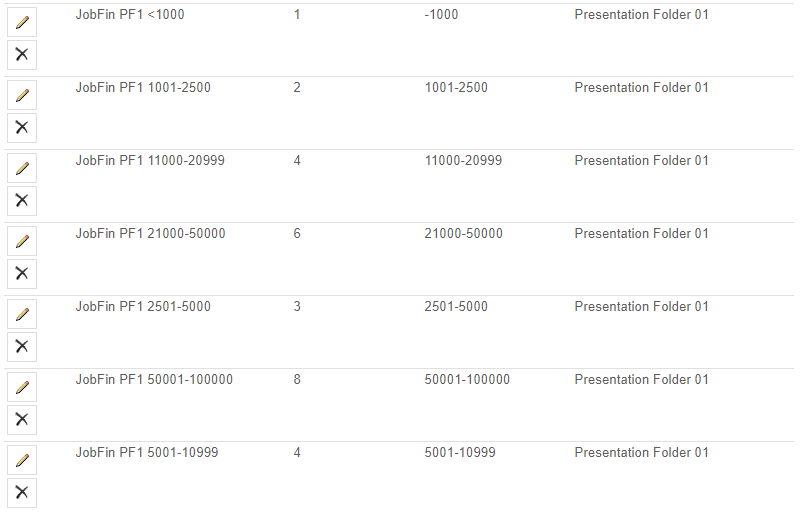

Presentation Folder 01
The following quantity breaks have been added:
Less than 1000
1001 to 2500
2501 to 5000
5001 to 10999
11000 to 20999
21000 to 50000
50001 to 100000
The following extra days to the standard turnarounds have been added:
0 to 1000: plus 1 working days
1001 to 2500: plus 2 working days
25001 to 5000: plus 3 working days
5001 to 10999: plus 4 working days
11000 to 20999: plus 4 working days
21000 to 50000: plus 6 working days
50001 to 100000: plus 8 working days
4pp Score and Hand Fold
This has 2 additional days for 0 to 5000 and 3 additional days for 5001 to 20999.
Anything above the maximum entered quantity will be a special TAT.
Existing turnarounds can be edited by clicking the ‘pencil’ icon or delete them by clicking the ‘X’ next to each item.

