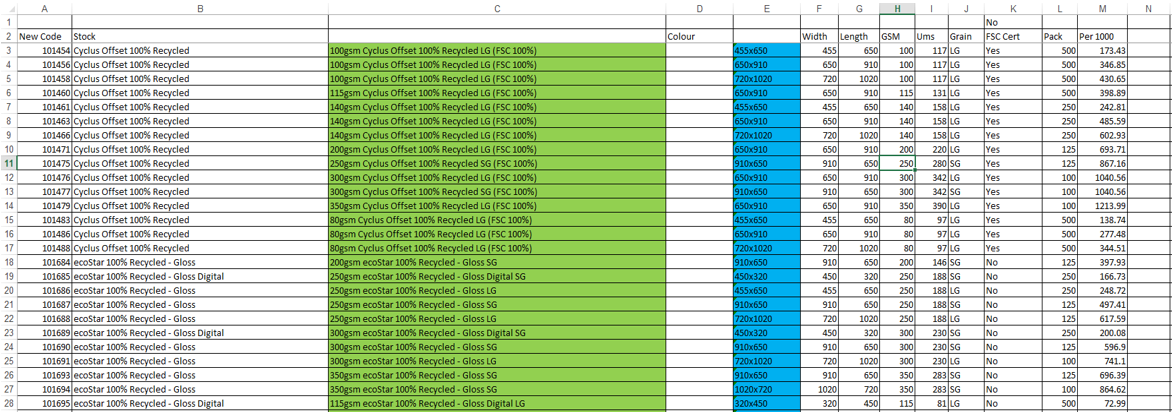
When you have got all the information back from the suppliers. It should be fully completed in the format as seen below.

As you can see all headings are highlighted and all fields are required (In this example they don’t have colour which is ok but most stocks will have a colour). This spreadsheet contains all of the necessary information that is needed to transfer into the upload spreadsheet.
In this spreadsheet I insert a new column and concatenate the description Follow below:
Concatenate-
Gsm number “100”
Then the letters “gsm”
Then create space which is “ “
Then stock description
Then create space which is “ “
Then Colour “ “
Then create space which is “ “
Then if they have confirmed through grain direction document add the grain “LG”
See screen snap below for completed concatenated stock description (highlighted in green).
Then in the same spreadsheet I concatenate the stock size:
Concatenate –
Width “455”
The letter “x”
Length “650”
(Highlighted in below spreadsheet in blue).
Next step is opening the stock csv upload spreadsheet. (You can download one of these from the bulk stock upload screen in IQ)
Step 1. Description - Copy the stock description from the supplier spreadsheet and paste into the “description” column in spreadsheet. (See column highlighted in Green)
Step 2. Create a Print IQ Code - This is an internal code that we make up usually start with 10001. (See column highlighted in Yellow)

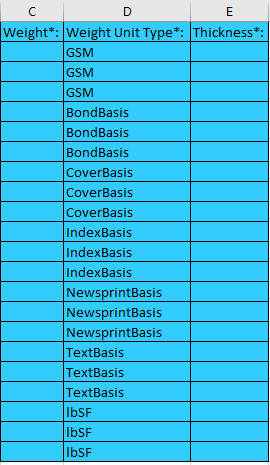
Step 3. Weight and Thickness - Copy and paste from supplier spreadsheet “gsm” and “ums” into specified columns. (See columns highlighted in Blue)
There is also the field "Weight Unit Type" The valid references to put into this field are"GSM" "BondBasis" "CoverBasis" "IndexBasis" "NewsprintBasis" "TextBasis" "lbSF" (Pound per square foot).
Step 4. Create a stock family – The stock family is an abbreviated code for the supplier. This is for IQ purposes only. (In this example supplier is BJ Ball so the stock family is “BJB” see column highlighted in Orange)
Step 5. Creating stock groups – These fields are not compulsory but I usually create 2 groups: 1. Supplier name (eg BJ Ball, Spicers, KW Doggetts) 2. Type of stock (eg. Flat sheets, Rolls, Envelopes) (See columns highlighted in Pink)
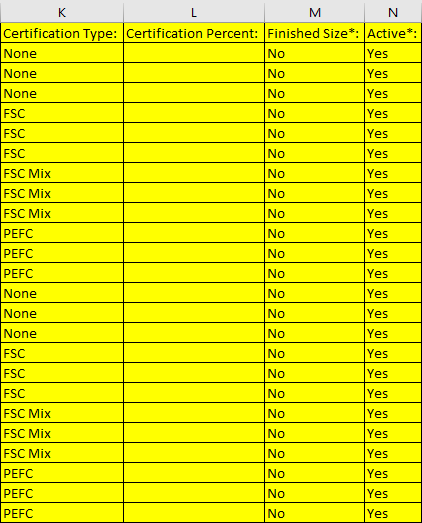
Step 6. The next two fields are about FSC these are:
“Certification Type” The valid references to put in this field are "None" "FSC" "FSC Mix" "PEFC"
"Certification Percent" This is the certification percent of the type chosen.
The other two fields are both "Yes" and "No" Fields
“Finished size” Unless doing envelope stocks this field is always “No”.
“Active” This field is always “Yes” unless there are stocks that you don’t want active.
(See columns highlighted in Yellow)
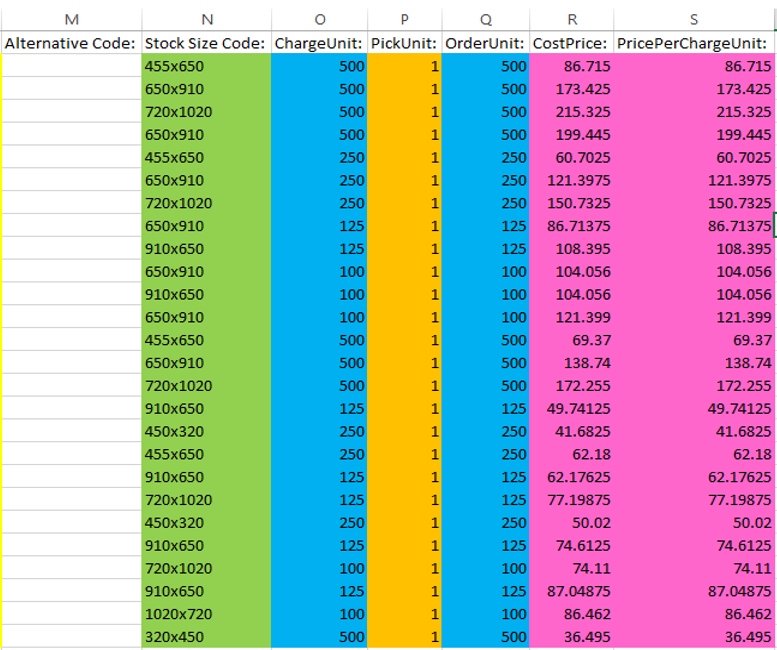
Step 7. Stock Size – Copy and paste stock size from supplier spreadsheet into specified field. (See column highlighted in Green)
Step 8. Charge and Order Unit – Copy and paste pack unit from supplier spreadsheet into specified field. (See columns highlighted in Blue)
Step 9. Pick Unit – This field is always “1”. (See column highlighted in Orange)
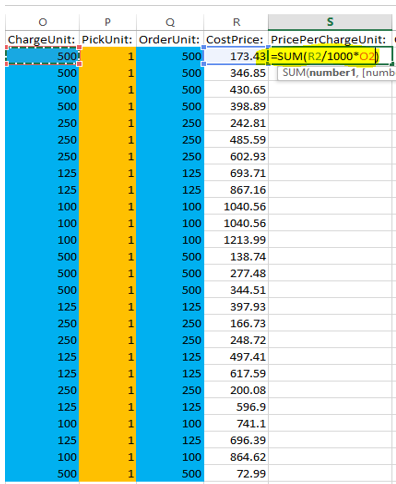
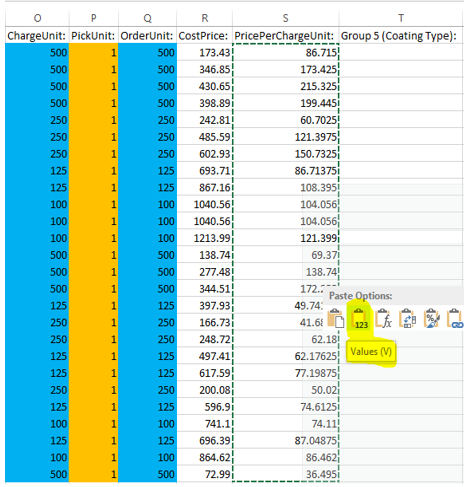
Step 10. “Cost Price” and “Price Per Charge Unit” – In the spreadsheet we get from the suppliers they give us a price per 1000 charge which is correct. So what we do is copy the price per 1000 from the supplier spreadsheet and copy into the “Cost Price” field. When then have to formulate the price per 1000 and the “charge unit” to get the price of the pack. See formula =SUM(R2/1000*O2) Copy the formulated price and paste as a value instead of formula. (See screen snaps below). Then copy and paste new price value into the “cost price” field so both fields are now identical. (See fields highlighted in Pink)
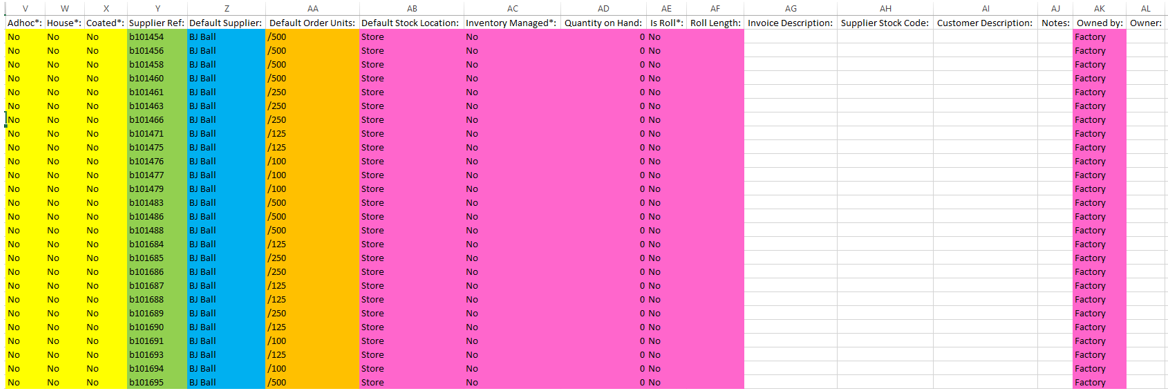
Step 11. The next three fields are “Yes” or “No”. I usually default all three fields to “No”. (See columns highlighted in Yellow)
Step 12. Supplier Reference – Copy and paste the “supplier code” from the supplier spreadsheet into specified field. (See column highlighted in Camo Green)
Step 13. Default Supplier – Code of the supplier that is in the system in this case “BJ Ball”. (See column highlighted in Blue)
Step 14. Default Order Units – create a new column with only a “/” then Concatenate a “/” and the “order units” into the “default order units” field. Copy and paste as value and remove column with “/” (See column highlighted in Orange)
Step 15. The six final fields I usually have default information for:
“Default Location” Is usually “Store” unless changed otherwise check Factory locations to double check what is in the site.
“Inventory Managed” Is set as “No”.
“Quantity on hand” Is set as “0”.
“Roll” is set as “No” unless it is a roll stock in that case would be “Yes”
“Roll Length” Unless it is a roll stock leave blank. (If roll stock insert length of roll).
“Owned By” Is set as “Factory”
(See columns highlighted in Pink)
After completing all of the steps above your spreadsheet is now completed and needs to be saved as a CSV file and ready for upload.
Before we upload the stock spreadsheet into the system there are a few thing that we have check and create in the system before we can successfully upload.
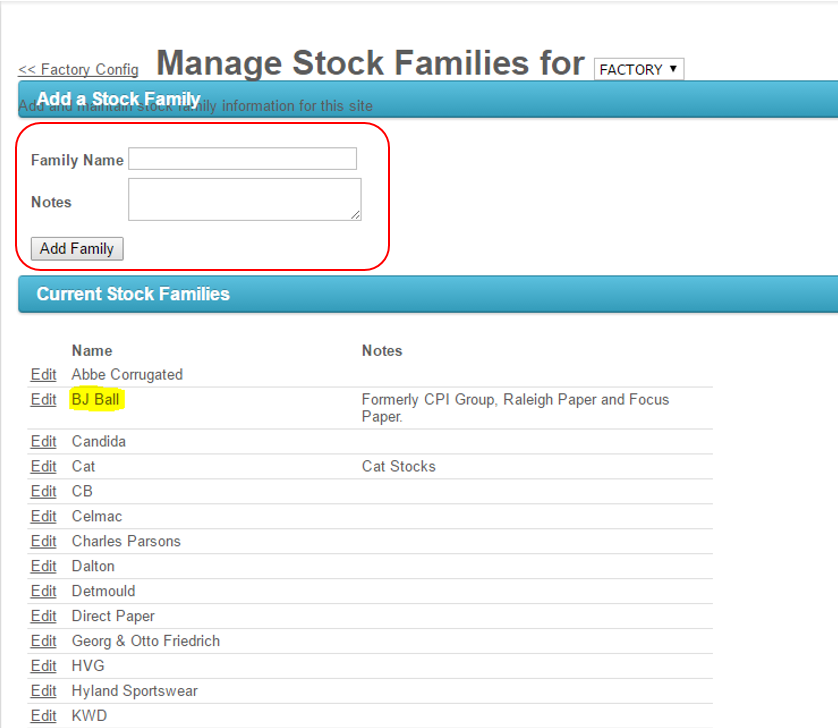
Step 16. Stock Family - The field “Stock Family” in the spreadsheet is connected to the stock family’s that are in the system. The stock family in this spreadsheet is “BJB” and as you can see by the screen snap below there is a stock family in the system as “BJB” if there wasn’t you can just create a new one and add. (See first screen snap below)
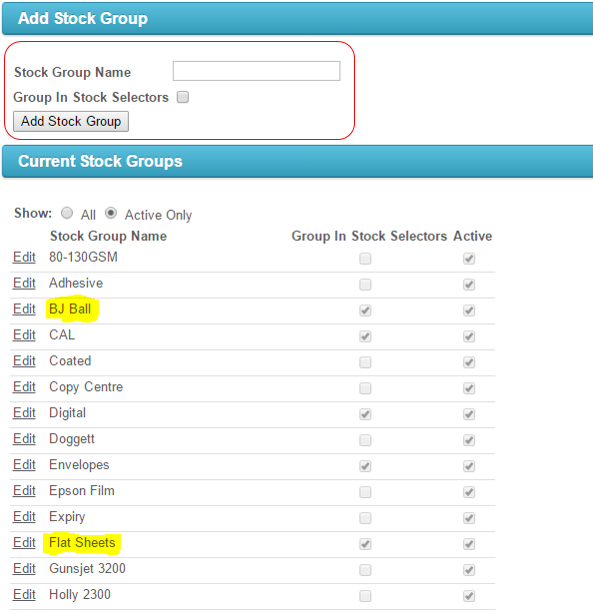
Step 17. Stock Groups – The field’s stock groups are similar to stock family you need to see if there are active stock groups that match the groups you have in your spreadsheet. In this example we had the stock groups of “BJ Ball” and “Flat Sheets” both of these are active stock groups in the system. Again if there wasn’t you can just create a new one and add. (See second screen snap below)
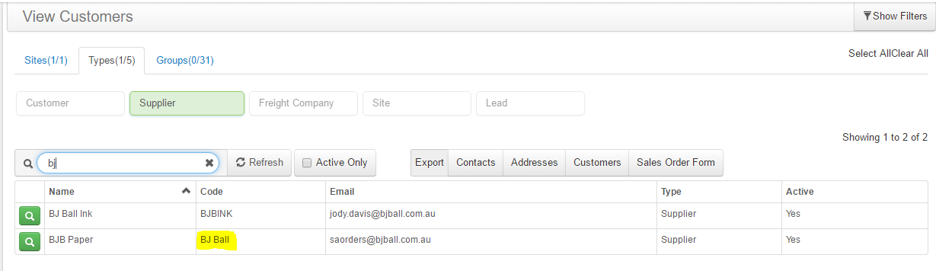
Step 18. Default Supplier – The field “Default Supplier” Similar to the stock family’s and stock groups whatever you have entered into this field in the spreadsheet you need to check to see if it matches the code in the supplier in IQ. (In this case “BJ Ball”). You would go and search in your suppliers for BJ Ball and as you can see below it matches so that will work. (See screen snap)
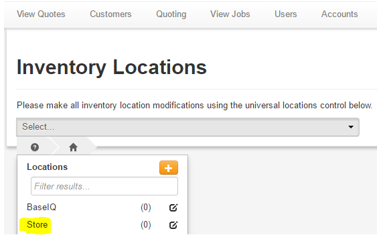
Step 19. Default Stock Location – The field “Default Stock Location” is another field that is linked to a part of IQ. Just like what you did with the “Default Supplier” go into IQ into and check to see if what you have in the spreadsheet matches what is in the “Inventory locations screen”. In this case it is “Store” (which is the most likely option for all sites) and it is in the factory locations. (See screen snap below)
Now that you have completed the spreadsheet correctly and checked to see if everything in the spreadsheet matches up with what is in the system you can now go and upload the csv stock spreadsheet into IQ.
Step 20. Uploading the csv stock spreadsheet – In the “Bulk Stock Upload” screen click choose file and then you choose the csv spreadsheet that you have ready for upload. Then click “verify” and when the spreadsheet has been verified click “Update Stock” and it will confirm that your stock spreadsheet has successfully been uploaded. (See Screen snaps below)